The consensus seems to be: It’s a very cool hat rack, actually.
 Say it aloud. ‘Hat Rack.’ Does it conjure up a Victorian-era floor-standing wooden Hydra? I’ve seen some very impressive modern takes on that classic, but in the end, most are still just short hat-posts that are affixed to tall floor-posts. Or maybe ‘Hat Rack’ suggests a wall-mounted row of identical oversized fish-hooks. I haven’t seen very many reimaginings of that trope.
To overthrow the stodgy hat-hanging cartel, I decided that I wanted a modern elegant alternative that did not touch either floor or walls. I aimed for something less utilitarian and more sculptural.
In addition to the aesthetic appeal, a ceiling-hung hat rack has a few practical advantages:
– By not covering floor space, it makes the floor just a bit easier to keep clean, either by humans or robots
– There is no preset limit on the number of hats that can be hung
– It is not subject to being knocked over by dogs, children, or the occasional clumsy adult
RESTORING AN OLD CHROME BAR
I started with a 3/4” chrome-plated iron bar of unknown origin. If you want to try this project with different materials, you could conceivably use a wooden dowel or other such central support rod. I like the chrome bar because its mass makes it very stable – it is less apt to blow around with the breeze of a passerby.
The chrome was rusted and pitted from years in my non-climate-controlled garage. I thought it was a goner, and even considered encapsulating it in some Flex-Seal-like product. Before I gave in, I decided to try to restore it. My first step was a soak in WD-40 Rust Remover and a light rub with a sponge. I assumed this would take off the rust but leave unplated steel behind. I was so wrong! The very ends of the rods had no chrome left, but the length of the rods came surprisingly clean with very little effort – and with most of the chrome plating still intact.
Step 2: try to clean up the pitting. I decided on a buff with 000 steel wool followed by 0000 steel wool. Again I was amazed at how effective these were.
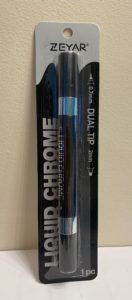 Step 3: try to restore any areas like the end caps where no chrome was left. I could have re-plated the entire rod, but I wanted to try something simpler. I used a Zeyar Liquid Chrome pen that I picked up from Amazon. This was a simple product to use: following the instructions on the pack, I shook the pen vigorously and then depressed and released the pen point many times until the chrome ink flowed. It took more presses than I expected, but once the ink started to flow, it flowed very neatly onto the workpiece. I then let it dry overnight.
The next day, there were still faint lines left over from where the ink met the original plating. I buffed them with a cloth and to my surprise and delight, the excess ink wiped cleanly off where the original chrome plating was, but the ink adhered well to the bare metal regions. So I judged this product to be quite good overall.
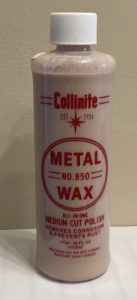 Step 4: final polish and preservation. Here I chose Collinite Metal Wax No. 850. We use it to clean and preserve the stainless steel on our sailboat, so I know that if it can hold up under the harsh conditions of salt air, it should hold up great in a climate-controlled house.
FABRICATION AND INSTALLATION
I drilled and tapped a hole in one end of the rod to receive a 3/8”-20 x 3/8” bolt. I then drilled a 5/64” hole thru the centerline of said bolt, and passed a length of stainless-steel wire thru the centerline hole of the bolt. I folded about an inch of the wire end back, and then wrapped the inch around the line in the manner of a fisherman’s knot.
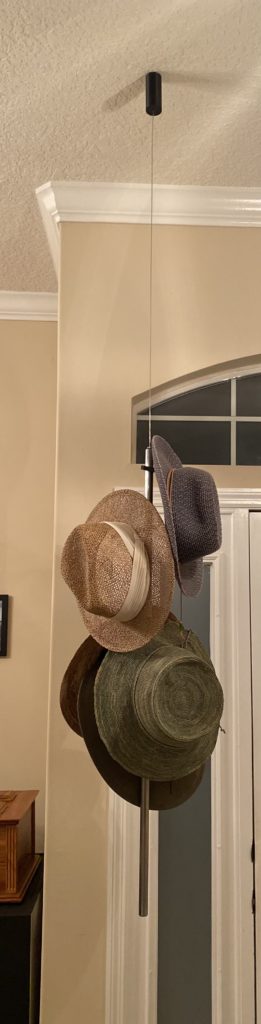
I threaded the bolt assembly to the rod, adding a few drops of threadlocker for safety’s sake. I 3D printed a black escutcheon: to match the modern language of the rod, I chose black PLA and designed the escutcheon as a simple tall thin cylinder. I threaded the finished cylinder onto the wire, and then added a thimble to the very end, giving a few twists of the bitter end of the wire to secure the thimble in place. This served to hang the assembly. I affixed a hook to a rafter of my house near the front door, and suspended the rod from the rafter hook, covering the hook and the thimble with the escutcheon. To hold the escutcheon up, I added one drop of rubber cement to the wire. It’s basically invisible from ground level.
To complete the project, I 3D printed a set of simple hat-posts. They are not attached in any permanent way – they simply slide up and down the post with a friction fit. This allows me to position as many hooks as I can in any orientation I like.
RESULTS
Overall I was pleased with how this project turned out! I do have a few observations:
- This project did turn out exactly as I envisioned, but once it was done, I found myself wondering if it was too modern – even for my very contemporary taste.
- Before I started, I wondered if hanging a few hats all on the same side would cause the rod to veer away from plumb. This is absolutely not a problem. Generally, hats weigh so little and the rod weighs so much that it remains plumb under basically all conditions.
- Apparently my family owns far too many hats because there is a capacity problem! I do have another identical chrome-plated rod and I could easily make another hat rack, but there are no good candidate spaces to hang it in my home.
The 3D printable portions of this rack are available on my TinkerCad site for free. You can print them in virtually any material you like; strength is not much of a concern when all you have to hold up is a hat.